


Having the speaker dust cap dented sucks. It makes the audio system sound bad. Worst case scenario? Dented dust cap poses potential risks of damaging the speaker.
This is why it is wise to fix a dented speaker dust cap as soon as possible. But how do you do it? Trust me, it is very easy and possible to do in under 15 minutes! In this article, you will see just that.
Also, you’ll find out How I replaced (when push came to shove) my dust caps and how I take care of them. By the end, you will have no difficulty managing these things at all.
What Is a Dust Cap? What Does It Do, Exactly?

If we go by Wikipedia, a dust cap is basically a curved dome. It’s mounted in two ways- either a concave or convex orientation. You’ll find it over the hole at the center of most speakers’ diaphragms.
Confused? Let me clarify.
A dust cap is a dome-like thing. It’s placed right over the central part of a speaker. Right beneath this dust cap, there is the central speaker. This thing aims to prevent anything, including dust or other small particles, from entering the main system.
This little cap is usually made from thin aluminum. But there are paper dust caps and plastic dust caps as well.
To tell you the truth, this cap isn’t a must for all types of speakers. However, it is mandatory for subwoofers. Active subwoofers come with accelerometers. Open up the “Voice Coil” and you’ll find one. I’ve seen these devices going bad within months just because there wasn’t a protective measure taken.
Now, why is it so important to use a dust cap? Well, as I said earlier, a dust cap protects the speakers from any type of particles. But this is not all. Dust cap prevents accidental tap and touch of any foreign object while running.
If an active speaker gets the slightest touch, it can get destroyed within seconds. Yes, they are this delicate.
Do These Caps Impact Listening Experience in any Way?
A dust cap surely makes a speaker look cooler. And now you know how they protect the speaker from harm. However, they do more than just protect things. I’ve tested speakers before and after installing dust caps, and the difference in audio quality was amazing.
Somehow, the dust cap made my speaker sound better. I think it was the aluminum cap that increased the tone’s quality.
According to a few re-runs, the frequency went through changes as well. Having a dust cap on increased the speaker’s frequency while removing it decreased it by a lot.
Apart from this, I heard chopping noises coming from my speaker. There was an air gap between the speaker cones. This is common when you don’t have any dust cap.
When the dust cap is not there, air flows into the speaker and goes between the cone and the magnet. As a result, a weird unusual sound is produced.
A similar issue occurred when my dust cap was dented. I have an aluminum dust cap on my speaker. It got dented, and after that, the dust cap failed to prevent airflow in the box. Eventually, the speaker ended up making a weird noise.
I couldn’t manage time to take care of the dented dust cap. As a result, it gradually collapsed with time. This resulted in further noise. When the dust cap collapsed, the speaker started to make a raspy sound. In this case, I had to replace the whole thing altogether.
I’ve never waited to fix a dented dust cap after this incident, and you shouldn’t as well.
Coming to the Point: How to Fix a Dented Dust Cap?
People often throw dented caps away without thinking twice. Fixing them IS possible. But it takes time – or so you’ve been told! Frankly, fixing them isn’t a problem.
Here I’ll tell you how I fix my dented caps. So far, I have dealt with paper, plastic, and metal dust caps. Let me tell you how I fixed each one within 15 minutes!
How To Fix a Dented Paper Dust Cap?
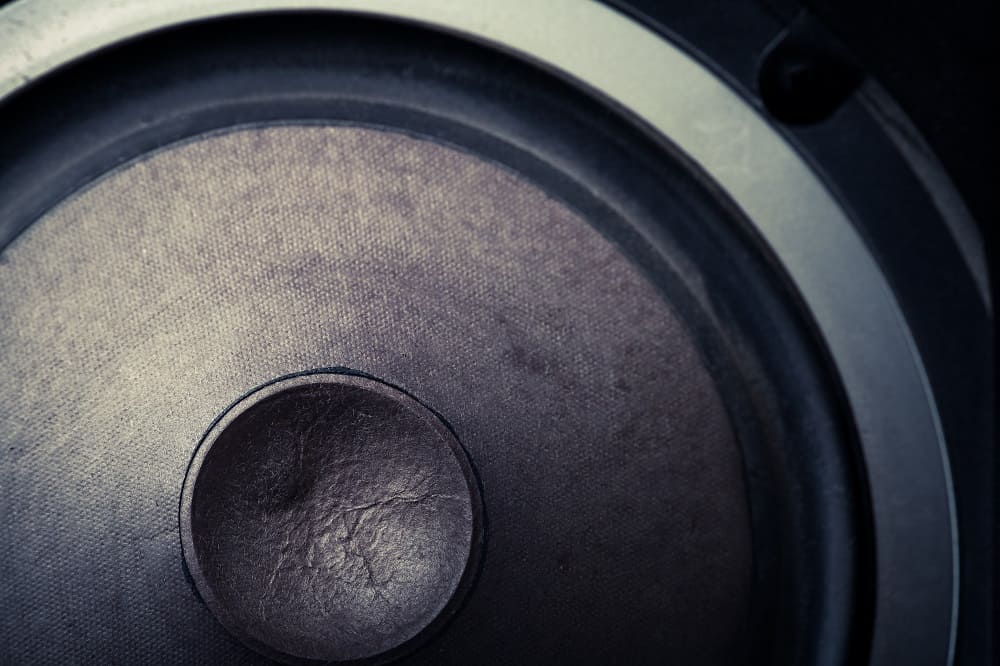
I found the paper dust caps easiest to fix. You just need a vacuum cleaner for the job. Here’s how I did it!
Firstly, I took the vacuum cleaner and put the hose near the dent of the dust cap. Then I turned the device on to suck the dent on the dust cap out of the cone.
Don’t put the hose too close to the cap. Make sure that the sucking pressure is not too high as well. It can affect the condition of the dust cap, tearing it and causing irreparable damage.
Don’t worry if you see wrinkles on your paper dust cap. It was supposed to be like this because of the dust caps material. However, this won’t affect the system’s sound quality in any way. Don’t worry about that.
How To Fix a Dented Plastic Dust Cap?

The method I use to repair a dented plastic dust cap is similar to the previous one except for a tiny bit of difference. I just make the plastic as flexible as the paper dust cap. What am I talking about? Let me clarify.
For this process, I take a hair blower in addition to the standard vacuum cleaner. Firstly, I make sure the plastic cap surface is totally clean. Then I kickstart the hair blower and circle the blower over the whole thing. I make sure that the hot air reaches every point of the plastic surface.
It is important to apply an equal amount of heat to the whole surface. This prevents any and all kinds of deformation. So be careful not to overheat the thing. I follow a simple process to avoid that.
While heating the plastic dust cap with a blower, I go by the feel rather than the look of the thing. You can feel the progress too by gently touching the surface. Do this, and you’ll be perfectly in tune and won’t overheat the plastic.
Once I feel that the plastic cap has now gained a bit of flexibility, I run to the next process while the plastic remains hot and soft. The next step is using a vacuum cleaner. Don’t worry, we’re not trying to do something as weird as it seems.
What I do with a vacuum cleaner is… I put the hose near the dented part of the soft, hot plastic and increased the sucking pressure. While you try this, make sure not to set the suction pressure too high. Start with low pressure, and increase it bit by bit.
Once the dent is almost fixed, reduce the sucking pressure slowly. Otherwise, the plastic cup can get a weird shape.
Another method I came up with is using strong sticky tape. This is the easiest and most hassle-free process I could find. But this trick can be applied only with soft plastics in tweeters.
Wondering how did I fix my dented plastic dust cap with tape?
Well, I took some strong sticky tape like this one and applied it to the dent nicely. I left one end exposed to hold and pull the tape off. After a few seconds, I pulled it off with steady hands.
I should probably tell you; it didn’t show results right away. I had to repeat the process twice to get a good shape on the dust cap.
Though I thought this would fix the whole dent, a bit of deformation still remained. Fortunately, I was able to fix it as well. I just applied a bit of heat as I did before.
The heat helped the plastic return to its original shape. As a result, I got my dented plastic dust cap fixed in less than… you guessed it! 15 minutes!
How To Fix a Dented Metal Dust Cap?

Unlike the soft, flexible paper and plastic dust caps, metal caps (made of aluminum, for example) are stronger. I found the most difficult to repair. Even when I tried to pull and repair the dents, visible creases and marks still remained on them.
If you are okay with the marks and scratches, go on and try this method I once applied.
Unscrew or remove the metal dust cap from its place and push the dent out using something solid and hard (e.g., a hammer). As the metal dust caps are made from thin aluminum, you won’t have to apply too much pressure.
But I recommend replacing the metal dust cap in case it is dented. This is the most effective way.
How To Replace Dust Cap on Your Speaker?
Your dust cap can be beyond repair. I have experienced the same with my old speaker dust cap. The cap was not only dented but had totally collapsed. Though this is unlikely to happen if you properly take care of your dust cap, it is still a possibility.
However, in case you are in this situation, you have to replace the product. Don’t worry. It’s nothing difficult. Here I have shown you how I did it.
As I said, it’s easy. Take a look.
How To Replace Paper Dust Cap on Speaker
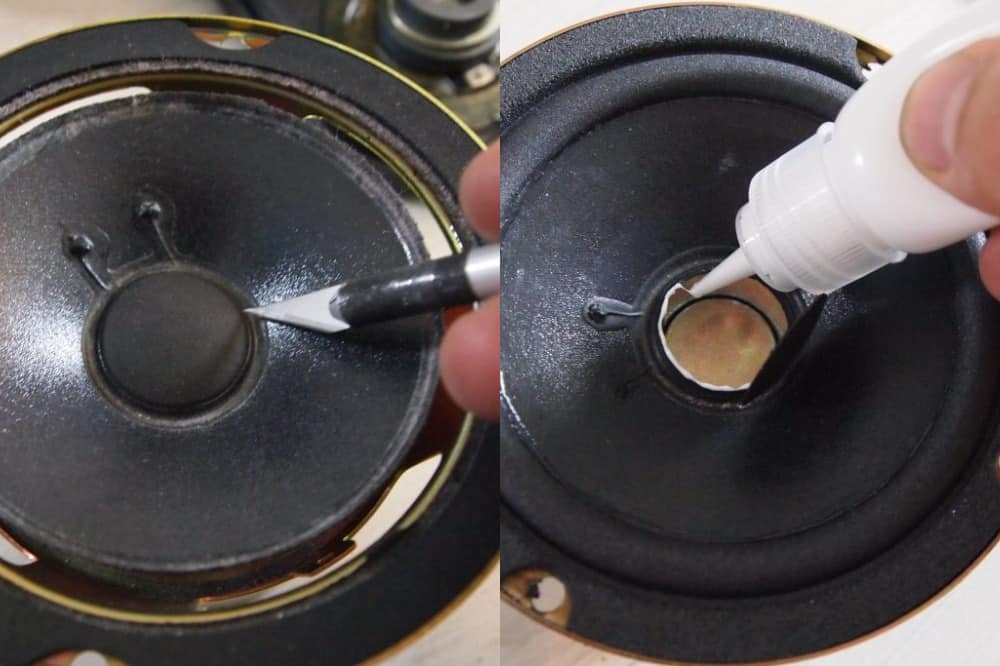
Before starting with the paper dust cap replacement, you have to get certain tools for the process. You can find them in your nearest hardware store.
The tools you need are:
● Sharp knife/scalpel
● Glue
● Mounting tape
Once you have gathered all these things, you can get right into the process.
I started off by cutting through the damaged cap close to the glue line. Using a short blade was convenient in this case. This prevented me from damaging the speaker cone.
After this, I removed the leftovers while removing the cover. I scraped the glued area smooth and clean. It is also important to make sure there is no debris on that surface.
Then I positioned my new paper dust cap on the cone and held it there. I used a strong masking tape to make sure that the cap was steady in its place.
Honestly, I prefer using MI 2000 adhesive to attach the dust cap to the speaker. The best practice is to apply a thin layer of glue all around the edge. I made sure that there were no gaps and the whole surface was covered with the adhesive.
And… you’re done! Yes, just like that! But I didn’t remove the masking tape yet. I waited for a day before removing it. I don’t recommend plugging in the speaker just yet.
Leaving it like this overnight is effective in making the bond stronger. I left the speaker in my garage with the cone facing the ceiling.
Finally, everything was ready to be used again. After this process, I honestly didn’t find a need for repairs, and I am sure that you won’t as well.